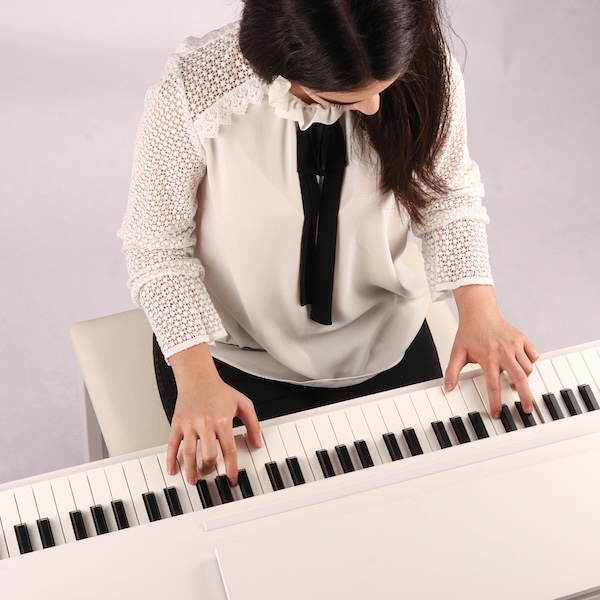
Adult Learning
Curriculum
Engineering
Technology
Why MuseFlow Is a Strong Alternative to Skoove for Sight-Reading-Focused Piano Learners
July 5, 2026

Choosing a piano learning app is no longer just about finding songs to play—it’s about choosing a learning method that aligns with your long-term goals. Apps like Skoove have helped many beginners get started, especially those interested in guided song-based learning. However, a growing group of learners is now looking for tools that prioritize independent music reading skills rather than song memorization alone.
This is where MuseFlow enters the conversation—not as a replacement for traditional piano apps, but as a focused alternative for learners who want to build sight-reading fluency as a core skill.

Skoove offers a structured, lesson-based approach that combines popular songs, classical repertoire, and foundational music theory. For learners who enjoy guided tutorials and playing recognizable pieces early on, this model can be motivating and accessible.
Like many traditional digital piano platforms, Skoove’s progression is largely song-centric. Learners often work through individual pieces step by step, repeating them until they are comfortable. This approach can be effective for repertoire building, but some educators note that extended reliance on guided play can slow the development of independent note-reading skills if sight reading is not consistently emphasized alongside repertoire practice.
MuseFlow takes a different educational position by centering its entire curriculum around sight-reading development. Rather than treating sight reading as a supporting skill, it becomes the main learning objective.

Instead of replaying the same pieces, learners are exposed to a continuous stream of short, structured musical material designed to reinforce:
This design encourages learners to process notation in real time—an ability closely associated with long-term musical independence.
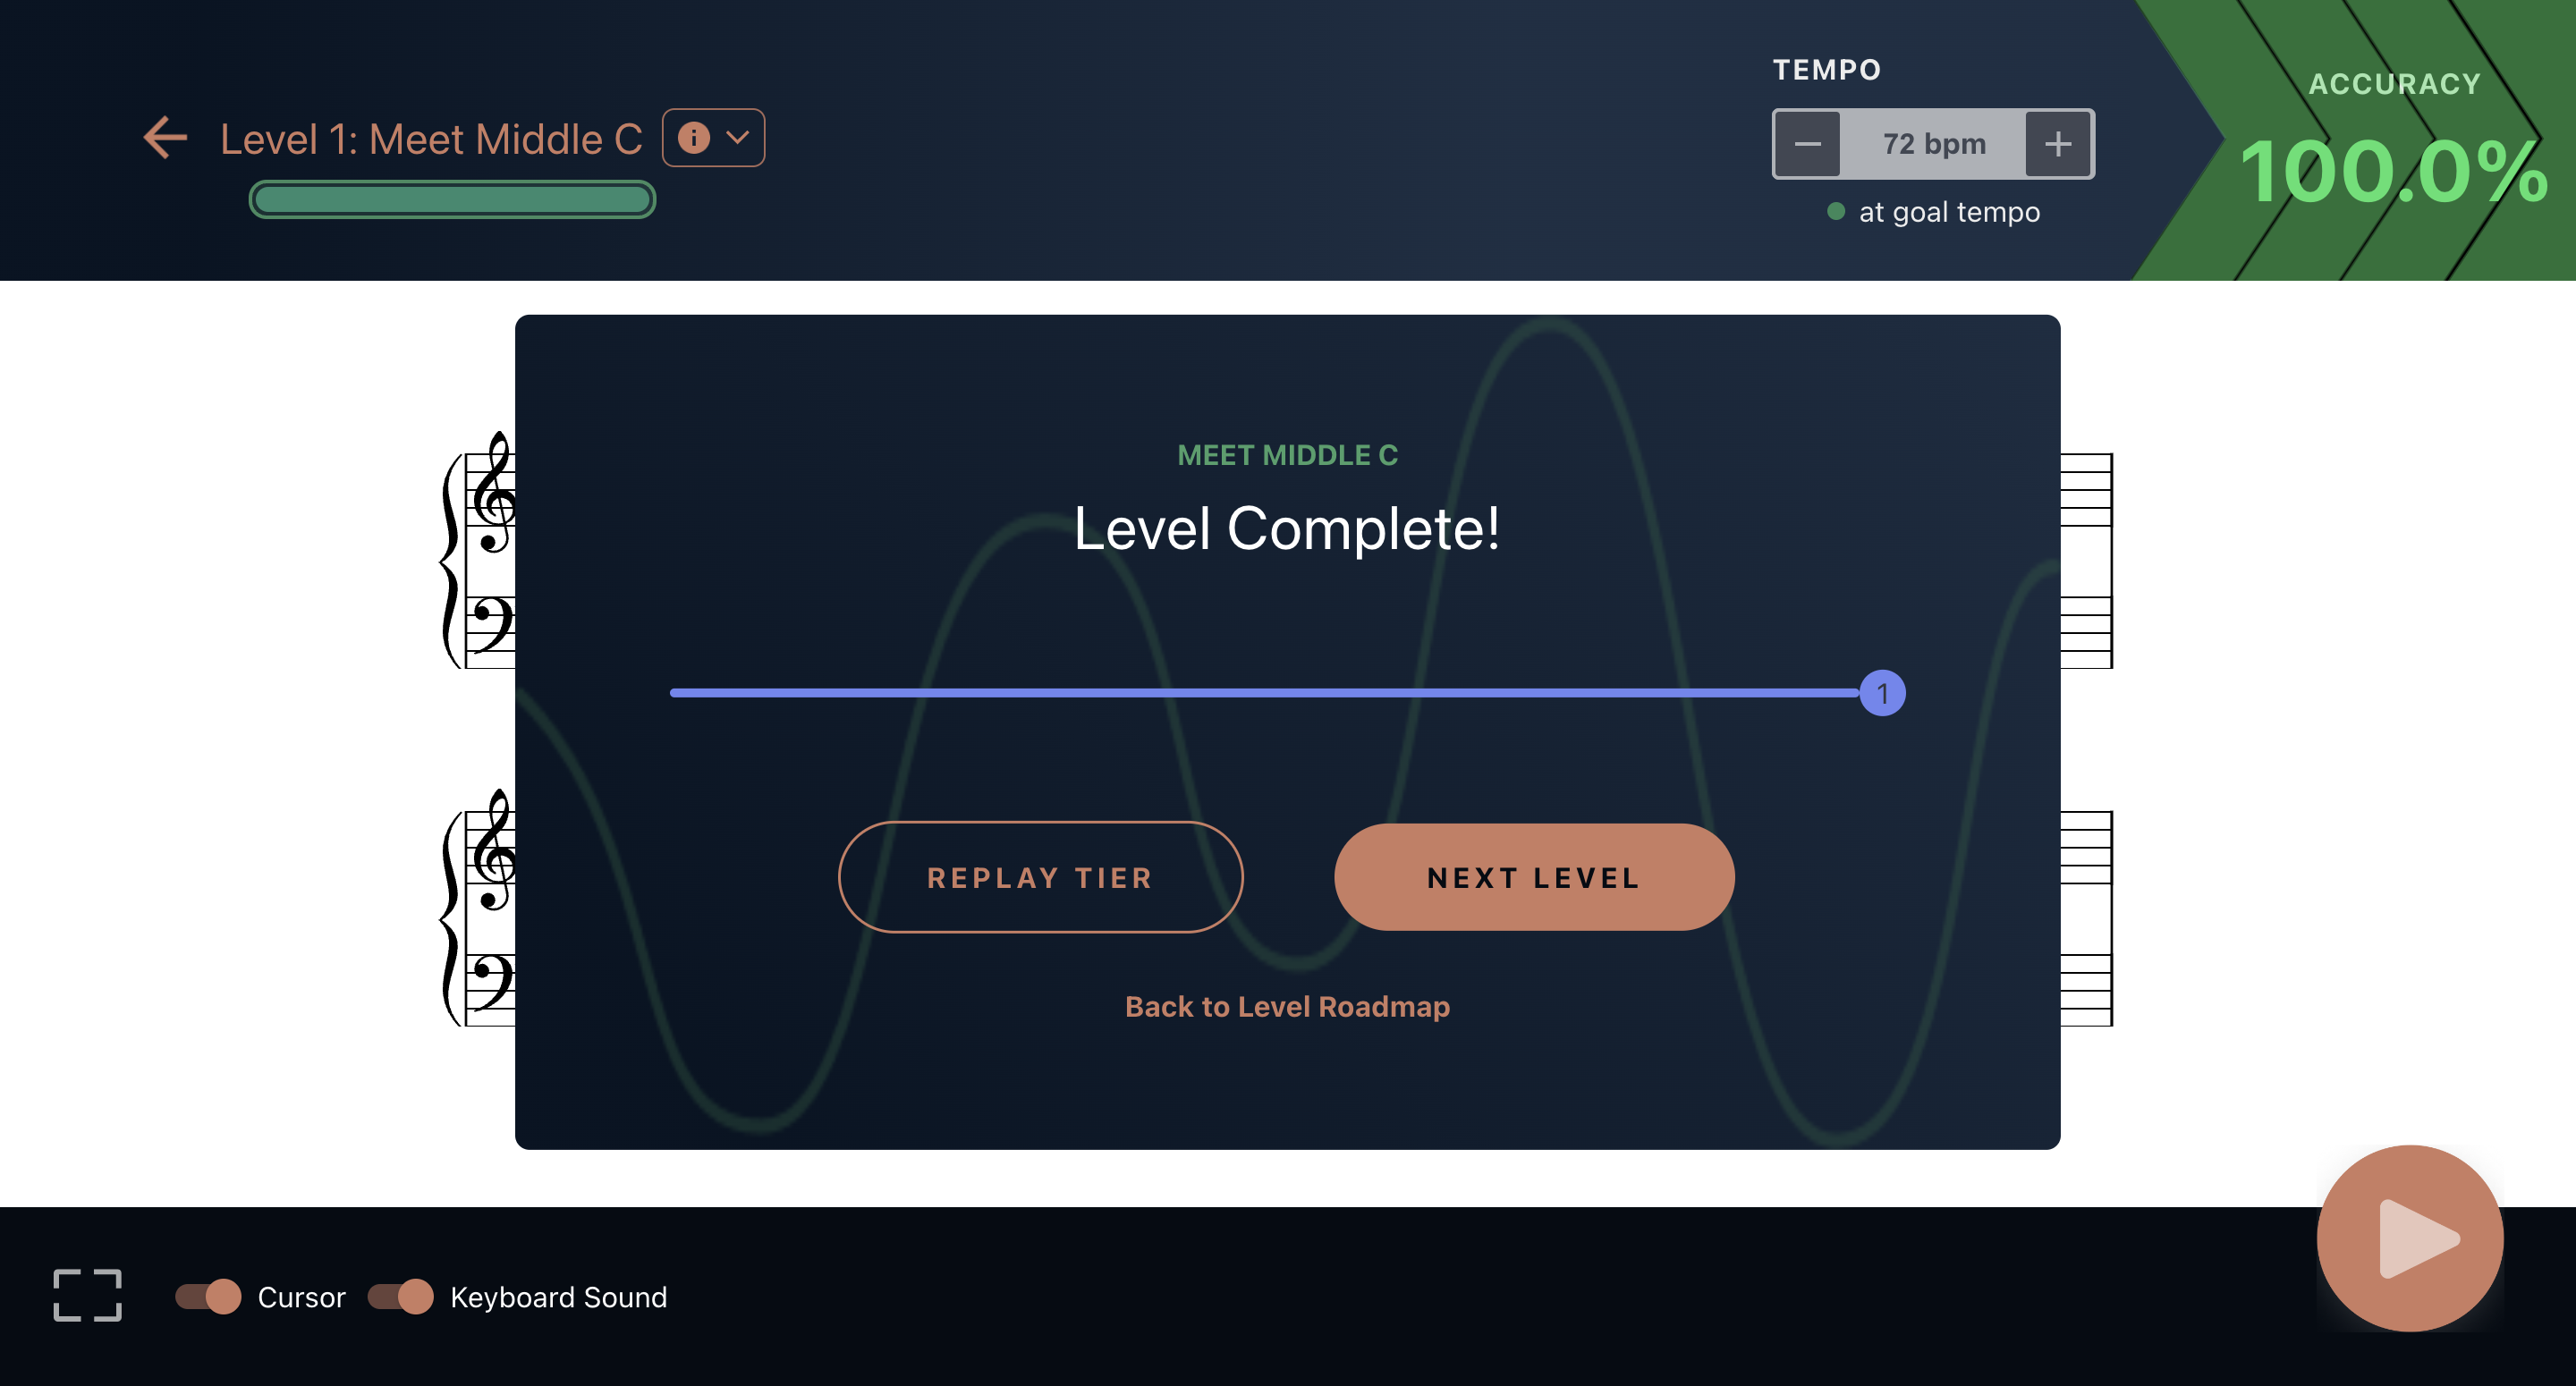
Rather than relying on static lessons, MuseFlow uses adaptive difficulty scaling. Exercises adjust based on timing accuracy, pitch accuracy, and reading speed, keeping the material challenging but achievable.
This balance is critical. Educational psychology research consistently shows that skills develop most efficiently when task difficulty closely matches the learner’s current ability—challenging enough to require focus, but not so difficult that it leads to frustration.
MuseFlow’s real-time feedback loop reinforces this process by immediately connecting:
This tight feedback cycle is particularly effective for sight reading, where delayed correction can lead to ingrained errors.
A practical distinction between platforms like Skoove and MuseFlow is learning outcomes:
MuseFlow emphasizes the second outcome. By constantly presenting new material rather than fixed songs, learners are trained to decode notation rather than rely on memory. Over time, this supports faster learning of new repertoire—both inside and outside the app.
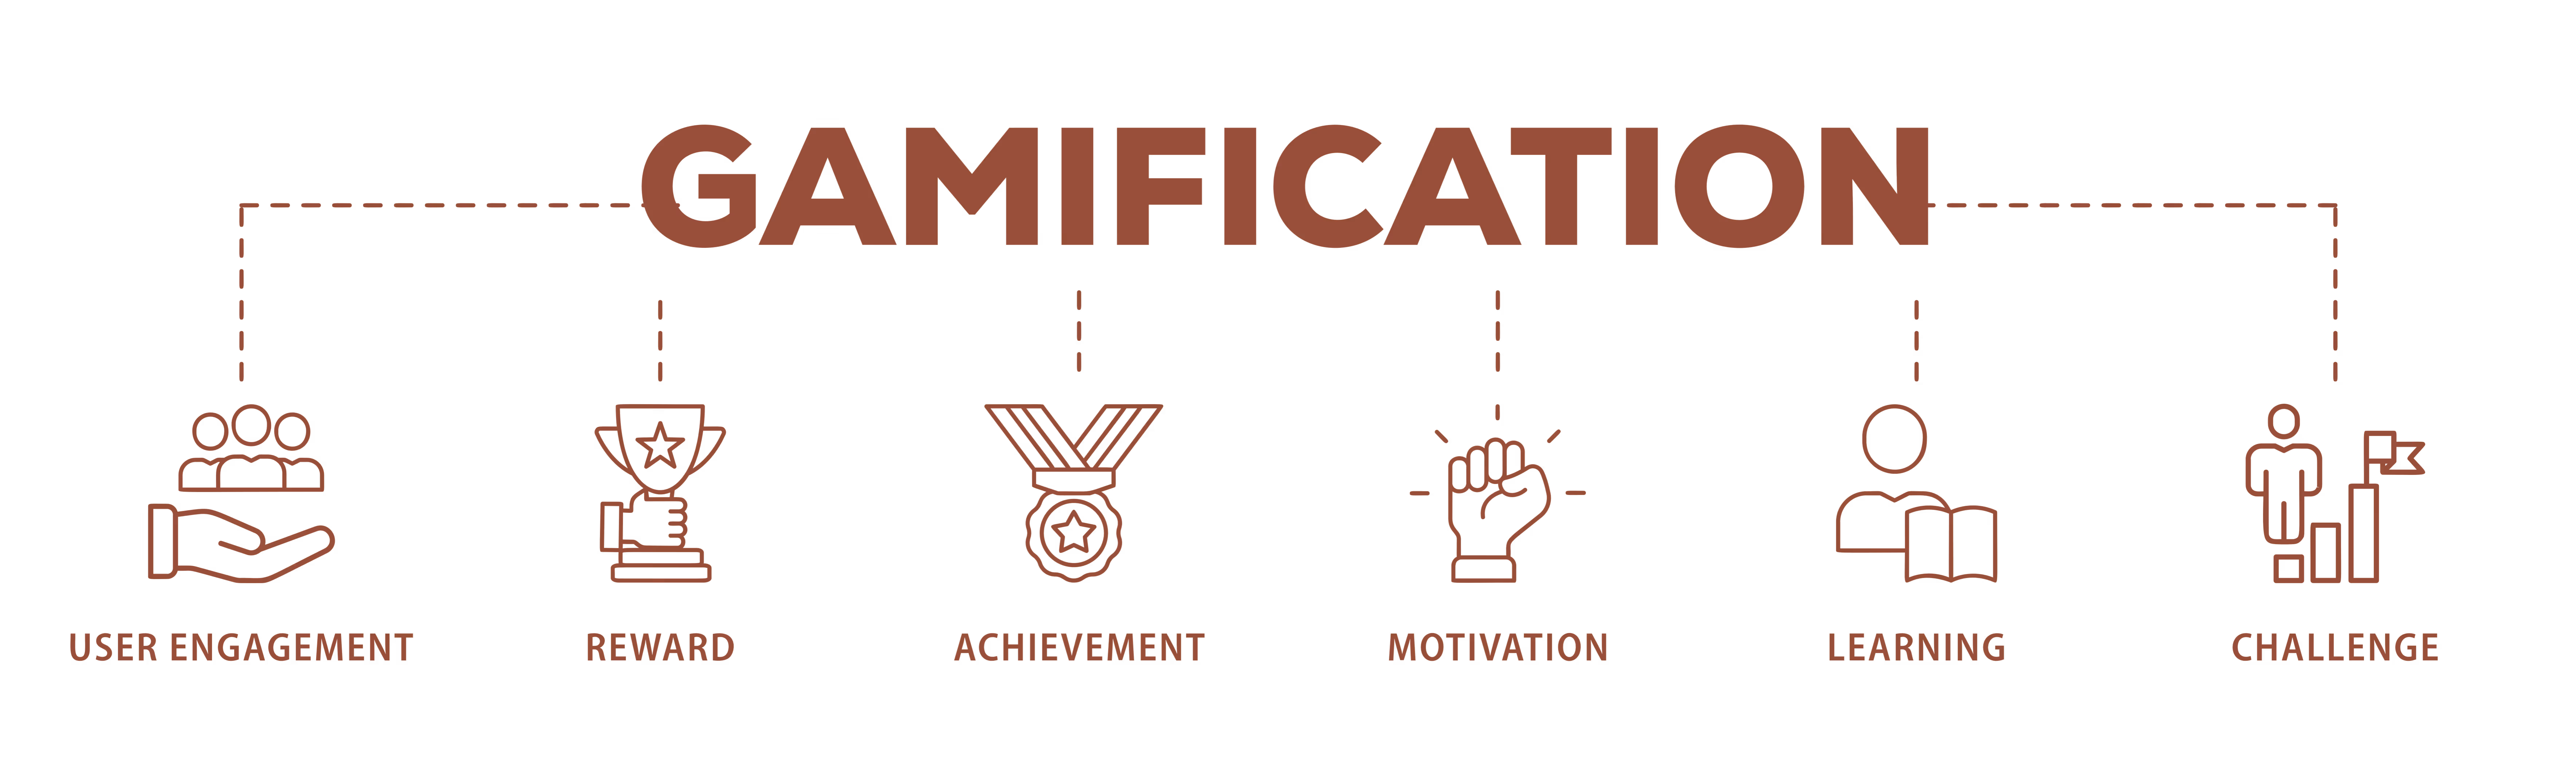
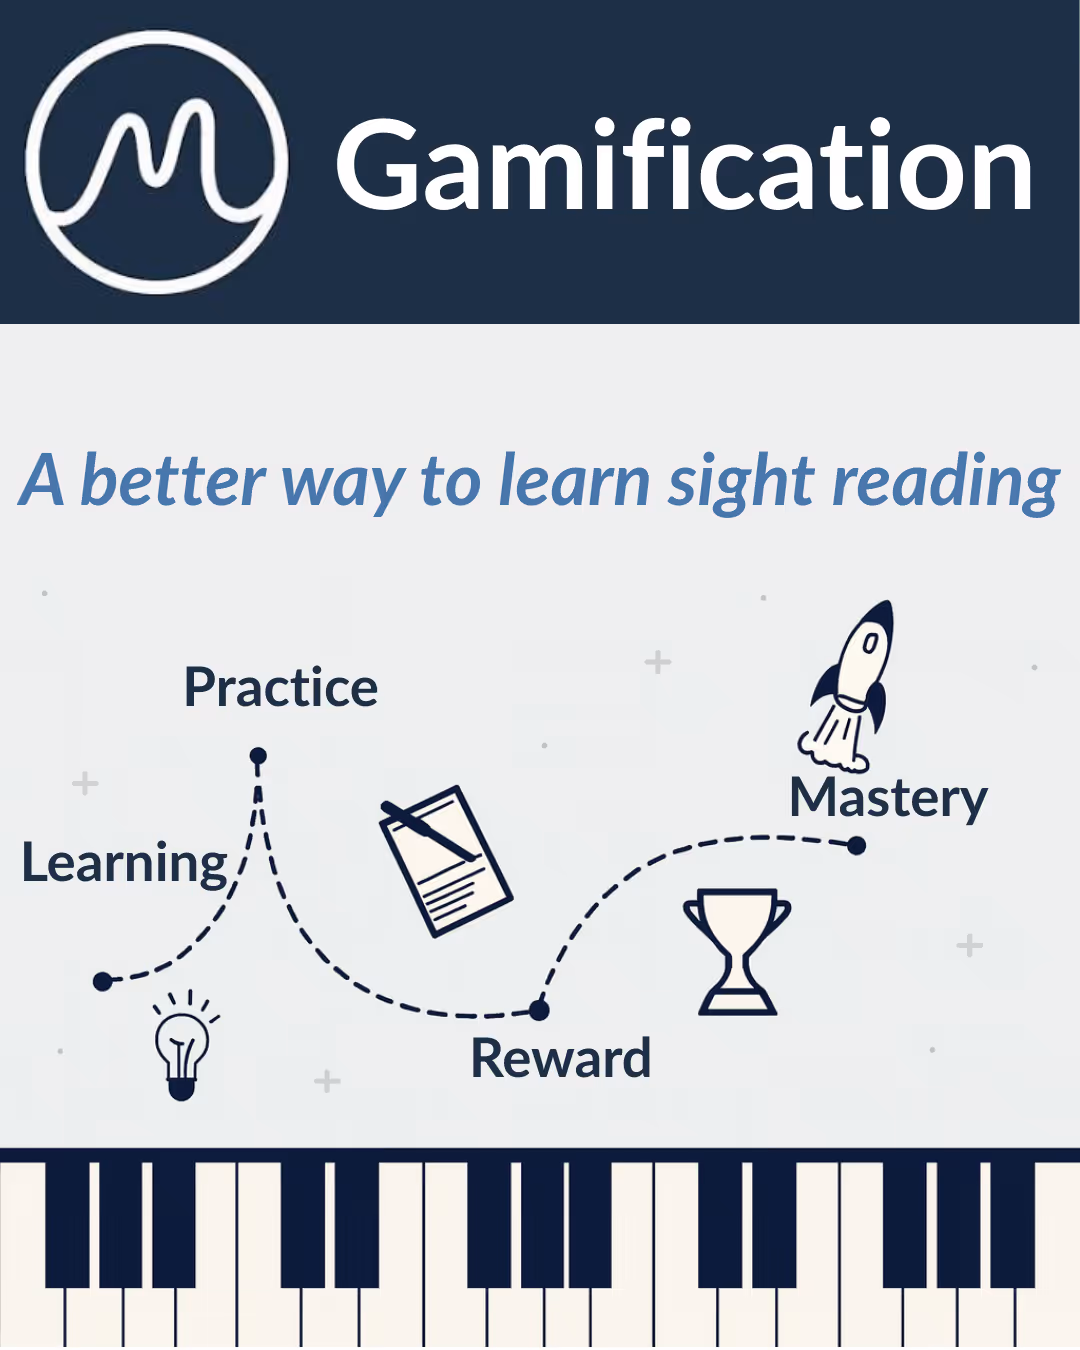
Gamification itself isn’t new, and not all implementations are effective. Its value depends on whether game mechanics support learning objectives rather than distract from them.
When applied correctly, gamified learning environments have been shown to:
MuseFlow uses gamification primarily to reinforce reading accuracy and timing, not as a reward system disconnected from musical outcomes. Progress indicators, adaptive pacing, and short achievement cycles are tied directly to measurable reading improvements.
There is no single “best” piano app—only tools that align better with specific goals.
Understanding this distinction helps learners choose tools intentionally rather than switching apps out of frustration later.
MuseFlow stands out not because it replaces traditional piano apps, but because it solves a specific, well-documented learning gap: fluent sight-reading. For learners who want to read music with confidence rather than rely on memorized pieces, it represents a focused and methodologically sound alternative.

For much of its history, piano education has followed a familiar structure: weekly lessons, fixed curricula, and long periods of unguided practice. While this model has produced accomplished musicians, it has also created barriers for many learners—slow progress, inconsistent motivation, and limited access to high-quality instruction. Today, advances in artificial intelligence (AI), data science, and learning design are reshaping how people approach piano study, opening new possibilities for more adaptive and engaging education.
Rather than replacing traditional teaching, modern technology is changing how learning happens between lessons and how practice time is used.
One of the most meaningful shifts in piano learning is personalization. AI-enabled learning systems can analyze a student’s playing in real time and adjust difficulty, pacing, and content accordingly. This allows learners to work at an appropriate level of challenge rather than following a rigid, pre-set sequence.
Key benefits of adaptive systems include:
Educational research consistently shows that timely feedback and appropriately matched challenges accelerate skill acquisition, particularly in complex motor tasks like playing an instrument.

Learning piano is not only a technical process—it is also a motivational one. Many learners abandon lessons not because of lack of ability, but because practice feels unrewarding or disconnected from progress.
This is where gamification plays an important role. Gamification applies structured challenges, progress tracking, and clear goals to learning environments. When used thoughtfully, it helps learners maintain consistency and focus over long periods.
Effective gamified learning systems emphasize:
Rather than trivializing music education, well-designed gamification supports the cognitive conditions needed for deep learning.
AI in piano education does not mean automation for its own sake. At its best, technology supports learners in areas where consistency and precision matter most. Tasks such as monitoring timing, pitch accuracy, and repetition benefit from software that can respond instantly and patiently.
Modern piano learning platforms—including systems like MuseFlow—use these capabilities to support structured practice outside of lessons. This allows students to arrive better prepared and more confident, having already addressed technical fundamentals during independent practice.
A common misconception is that AI-driven learning tools aim to replace teachers. In practice, the opposite is true. When technology handles repetitive technical feedback, teachers can focus on higher-level musical skills that require human insight.
Human instructors excel at:
The most effective learning environments combine intelligent practice tools with experienced educators who help students develop musical identity and expression.

Technology is also reducing long-standing barriers to music education. High costs, inflexible schedules, and geographic limitations have historically restricted access to piano instruction. Digital tools make it possible for more learners to practice consistently, regardless of location or background.
This broader access does not dilute musical standards; instead, it allows more students to build solid foundations before pursuing advanced study, whether independently or with a teacher.
Learners navigating today’s educational landscape can benefit from a few core principles:
By aligning practice with how people actually learn, modern piano education becomes more sustainable, motivating, and effective.
.png)
The future of piano education is not defined by AI or gamification alone. It lies in thoughtful integration—using technology to enhance learning while preserving the human elements that make music meaningful. When applied with care, these tools help learners progress efficiently, stay motivated, and develop lasting musical skills.
Many piano learners struggle not because they lack talent, but because sustaining motivation and effective practice over time is difficult. This challenge is especially common among beginners, who often face repetitive exercises before they experience the satisfaction of musical progress. In response, gamified piano learning has emerged as an alternative approach that aims to make practice more engaging while supporting skill development.
Rather than replacing established teaching traditions, gamified learning builds on insights from cognitive science and music education to address common obstacles such as disengagement, inconsistent practice, and delayed feedback. Platforms such as MuseFlow apply these principles by combining structured skill progression with real-time feedback to help learners maintain consistent practice habits.
Conventional piano instruction has long emphasized scales, exercises, and repertoire study. These elements remain foundational in music education, but research suggests that how learners engage with practice can significantly influence outcomes. When instruction relies heavily on repetition without sufficient variation or feedback, learners may struggle to transfer skills across different musical contexts.
Educational research on music learning indicates that skill transfer depends strongly on how closely new tasks resemble prior learning experiences. Skills practiced only in narrow or repetitive contexts are less likely to generalize unless learners encounter them across varied musical material. This helps explain why some students plateau despite consistent effort.

Gamified piano learning addresses these challenges by integrating structured feedback, progressive difficulty, and visible progress indicators. Gamification does not simply mean adding points or badges; it refers to applying design principles that support sustained attention and goal-directed behavior.
Research in educational psychology consistently shows that student engagement plays a critical role in learning outcomes, particularly when feedback is immediate and actionable. In music learning, timely feedback helps prevent errors from becoming ingrained habits, which is especially important for beginners developing fundamental skills like sight reading and rhythm.
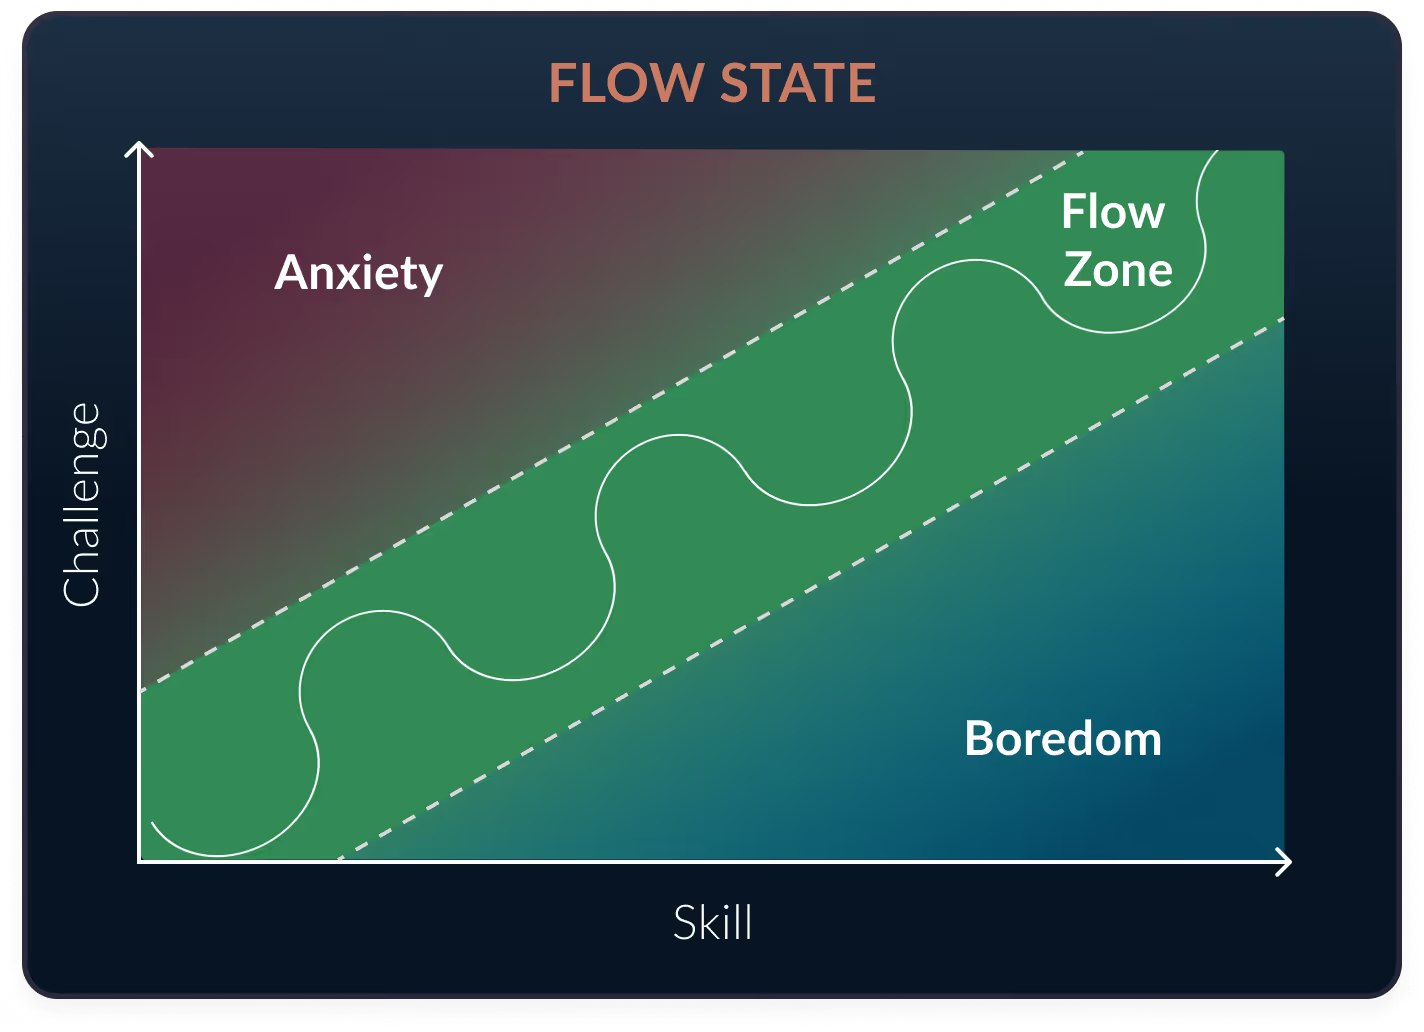
One concept often referenced in discussions of gamified learning is flow state, a term introduced by psychologist Mihaly Csikszentmihalyi. Flow describes a mental state in which individuals are fully absorbed in an activity because the level of challenge closely matches their skill level. In educational contexts, this balance helps learners remain focused without becoming bored or overwhelmed.
In music education, flow is more likely to occur when learners encounter new but manageable material, receive clear feedback, and can measure progress. These conditions align closely with findings from learning science that emphasize optimal challenge and deliberate practice as drivers of skill acquisition.
Music educator Dr. John Koch has described this approach as transformative, noting that sustained flow is difficult for many learners to achieve through unstructured practice alone. His observation reflects a broader consensus in pedagogy: learning environments that actively manage challenge and feedback tend to support deeper engagement.

Gamified piano platforms apply these research-backed ideas by:
By emphasizing sight reading and pattern recognition across many short exercises, learners practice skills in multiple contexts. This supports better transfer when encountering unfamiliar music, a key goal of musicianship.
Importantly, this approach does not eliminate the role of teachers. Instead, it allows technical skill development to occur more efficiently between lessons, freeing instructional time for musical expression, interpretation, and creativity.

Motivation remains one of the strongest predictors of long-term learning success. Studies on gamified learning environments show that learners are more likely to maintain consistent practice when tasks provide immediate feedback and visible progress.
While individual results vary, platforms that incorporate these principles often report higher practice frequency and longer engagement compared with unstructured self-practice. This aligns with broader findings that enjoyment and perceived progress significantly influence persistence in skill-based learning.
Gamified learning is not limited to children. Adults, in particular, benefit from structured feedback and flexible practice schedules. Whether a learner is starting from scratch or returning to piano after years away, gamified approaches can support consistent practice while reinforcing core skills such as sight-reading and rhythm.
Gamified piano learning works not because it turns music into a game, but because it applies well-established learning principles: engagement, feedback, variation, and optimal challenge. When thoughtfully designed, it complements traditional instruction and helps learners build transferable skills more efficiently.
As music education continues to evolve, approaches that combine pedagogical rigor with learner-centered design may offer a more sustainable path for long-term musical growth.
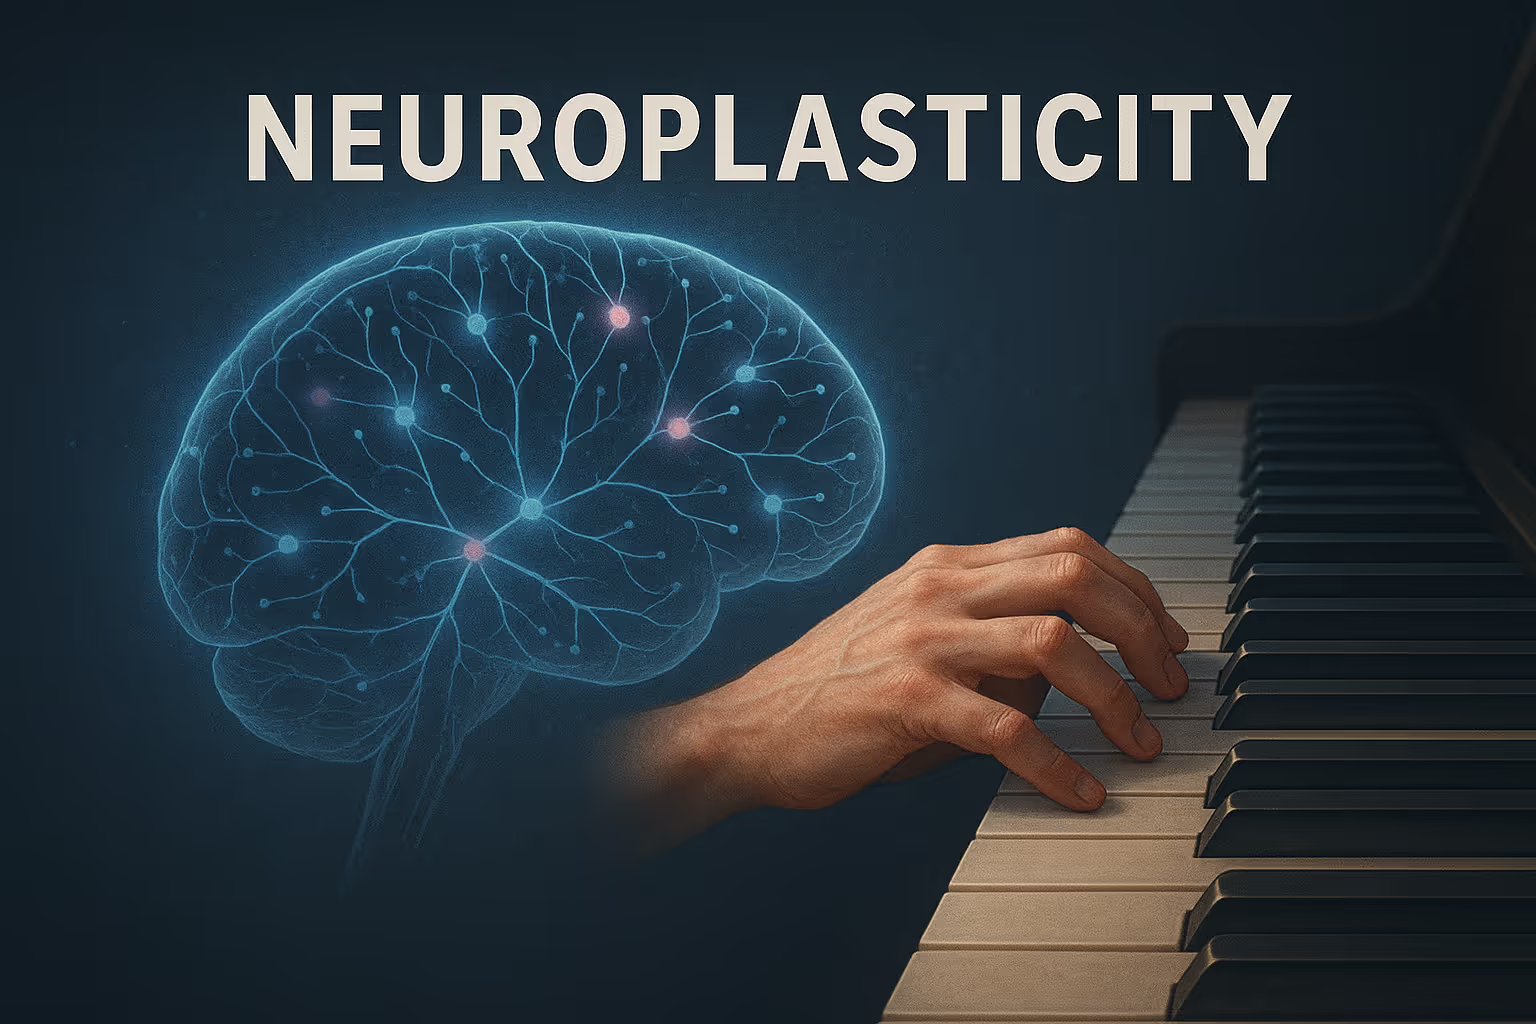
Many adults wonder if it’s too late to learn piano at 30, 40, or even 60. Concerns about age-related limitations and the so-called “critical period” for learning often discourage adults from pursuing musical goals. However, research in neuroscience and adult learning suggests that the brain remains capable of acquiring new skills well into adulthood. Adult learners bring unique advantages that can make starting piano later in life both practical and rewarding.

For decades, people believed that musical ability had to be developed in childhood. Modern neuroscience challenges this notion. Studies indicate that adult brains maintain the ability to form new neural connections, a property known as neuroplasticity. Musical training in adults has been shown to produce measurable changes in brain structure and function, improving coordination, memory, and auditory processing. While adults may learn differently than children, these neural adaptations support sustained, meaningful skill development.
Neuroplasticity allows adult learners to integrate new information with existing knowledge, enhancing pattern recognition and retention. This capacity, combined with focused attention and deliberate practice, enables adults to make steady progress on the piano.
Adults possess several characteristics that can accelerate learning:
While these advantages are significant, adult learners may still benefit from guidance or feedback from teachers or structured learning tools, especially for technical skills or sight reading.
Digital tools like MuseFlow offer structured support for adult learners. The platform provides adaptive exercises, real-time performance analysis, and a structured approach to skill development, allowing adults to practice independently while maintaining efficiency.
Key features include:
These features create a framework that aligns with adult learning principles, supporting consistent practice and measurable progress without requiring constant instructor oversight.

Adults may encounter specific obstacles when learning piano:
By adopting a growth mindset and integrating structured practice tools, adults can navigate these challenges successfully.
Adults bring an emotional depth to learning that can accelerate skill acquisition. Music linked to personal memories or experiences provides motivation and meaningful engagement. This emotional connection enhances memory retention and supports sustained practice. Coupled with neuroplasticity, these factors allow adults to develop piano skills in a way that is both cognitively and emotionally rewarding.

Research and practical experience indicate that adult learners are well-equipped to begin piano study at any age. Brain plasticity, intrinsic motivation, and goal-oriented practice provide a foundation for effective learning. Platforms like MuseFlow offer structured practice environments, adaptive feedback, and flexible scheduling that support these principles.
Adult learners can make steady, meaningful progress by combining deliberate practice, technology-assisted learning, and a growth-oriented mindset. Age alone is not a barrier; with the right approach, the journey to piano proficiency can start at 30, 40, or beyond.
Learning to read piano notes is often treated as a test of memory. Beginners are told to memorize every line and space on the staff, drill flashcards, and hope fluency appears over time. In reality, that approach is exactly why many students stall early. The easiest way to read piano notes is not memorization—it’s understanding how musical notation works as a visual system.
When note reading is taught through patterns and relationships, beginners progress faster, retain more, and develop confidence instead of frustration.
Many beginner piano methods rely heavily on rote learning. Students memorize note names without understanding how notes relate to each other on the staff or the keyboard. This creates a fragile skill set: if a note hasn’t been memorized, reading breaks down.
Educational research consistently shows that early music learning is most effective when it combines visual recognition, auditory feedback, and physical movement. When one of these elements is missing, learning becomes inefficient and discouraging. Treating note reading as a memory-only task ignores how the brain actually processes symbols and patterns.
The result is predictable: students can name isolated notes but struggle to read music smoothly in real time.

Reading music is a form of symbol decoding, similar to reading language. Neuroscience research published through the U.S. National Institutes of Health has shown that music literacy is associated with measurable changes in brain regions related to visual processing, motor coordination, and language-related skills.
Musicians, especially those trained to read notation fluently, often demonstrate stronger pattern recognition and reading fluency in non-musical tasks as well. These benefits don’t come from memorizing symbols; they come from learning how symbols relate to each other within a structured system.
For beginners, this means the goal should be recognition, not recall.
The easiest way to read piano notes is to anchor your reading around a small number of landmark notes. Instead of learning every note at once, beginners focus on a few reference points on the staff and keyboard.
Common landmarks include:
These notes act like navigation markers. Once a landmark is recognized instantly, other notes are identified by their distance and direction from that point rather than by memorization. This mirrors how fluent readers recognize words by shape and context rather than spelling each letter.

After landmarks, interval recognition becomes the next key skill. An interval is the distance between two notes. Beginners who learn to identify steps, skips, and repeated notes can read music faster—even without naming every note explicitly.
For example, if you know a note is Middle C, and the next note is one step higher, your brain processes the relationship immediately. This method reduces cognitive load and allows reading to keep pace with playing.
Interval-based reading is widely used in modern piano pedagogy because it scales. As music becomes more complex, the same principles still apply.
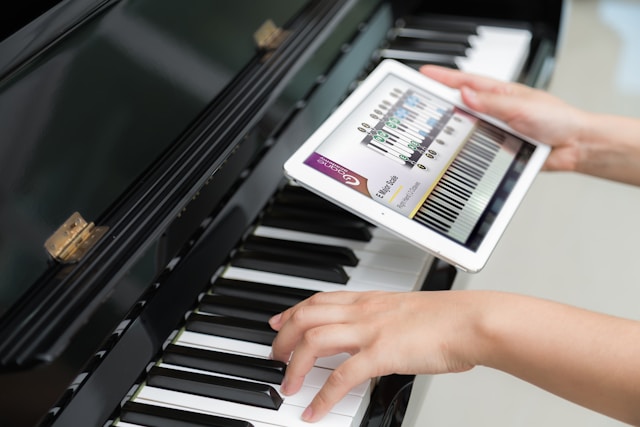
Digital tools can support note reading when they reinforce correct learning principles. Visual feedback, gradual difficulty increases, and immediate correction can help beginners avoid developing bad habits early.
However, technology should support pattern recognition, not replace it. Apps and platforms work best when they:
Used correctly, technology accelerates learning. Used poorly, it becomes another memorization crutch.

There is no shortcut that replaces consistency. Short, daily practice sessions are far more effective than occasional long ones. Even 10–15 minutes of focused reading practice can lead to noticeable improvement within weeks.
Over time, patterns become automatic. The staff stops feeling abstract, and note reading starts to resemble reading text—recognition happens instantly, without conscious decoding.
The difference between beginners who struggle and those who progress is not talent. It’s approach. When beginners learn to read piano notes through landmarks, intervals, and consistent practice, the skill becomes manageable—and even enjoyable.

The easiest way to read piano notes for beginners is to stop treating music as something to memorize and start treating it as something to understand. By focusing on patterns, using landmark notes as reference points, recognizing note relationships, and practicing consistently, beginners develop real reading fluency. When note reading aligns with how the brain naturally processes visual, auditory, and motor information, progress becomes faster and more sustainable. Digital learning platforms such as MuseFlow can support this approach by reinforcing pattern recognition through guided, structured practice.
Getting bored while learning piano is one of the most common reasons students quit before reaching their musical goals. Many learners begin with enthusiasm, only to find that daily practice gradually feels repetitive, unrewarding, or disconnected from real progress. If this sounds familiar, the issue is likely not a lack of talent or discipline—it’s the structure of practice itself.
Boredom during piano practice is often a signal that learning methods are misaligned with how people stay engaged and develop skills over time.

Studies on skill acquisition consistently identify three conditions that support sustained engagement and progress:
Immediate feedback
Learners improve more efficiently when they can instantly see or hear whether an action was correct. Delayed feedback increases uncertainty and slows learning.
Balanced challenge
Tasks that are too easy quickly become boring, while tasks that are too difficult create frustration. Optimal learning happens in the middle ground, where challenge slightly exceeds current skill.
Clear progress signals
Visible indicators of improvement—accuracy, consistency, or speed—help learners connect effort with results, sustaining motivation over time.
Music education research also highlights the importance of multisensory learning. Effective piano instruction integrates visual (notation), auditory (sound), and motor (movement) processes. When these systems work together, retention improves and mental fatigue is reduced.
When practice lacks these elements, learners often slip into an “autopilot” mode, repeating notes without meaningful engagement.

Before changing tools or platforms, several evidence-based strategies can help reduce boredom:
These strategies are effective regardless of teaching style and can significantly improve engagement when applied consistently.

Some modern piano-learning platforms attempt to operationalize these learning principles by automating feedback, adapting difficulty, and increasing practice variety. When designed well, this can reduce common friction points, particularly for beginners or independent learners.
For example, platforms such as MuseFlow emphasize continuous sight-reading practice with real-time accuracy feedback and adaptive challenge levels. Used appropriately, this type of system can help learners remain within a productive difficulty range instead of relying on repeated drills alone.
It’s important to view these tools as practice supports, not replacements for musical instruction, expression, or repertoire study. Their value lies in reinforcing core learning principles, not bypassing them.
Avoiding boredom while learning piano doesn’t require more willpower or longer practice sessions. It requires aligning practice methods with how people actually learn and stay engaged.
When feedback is timely, challenges are balanced, and progress is visible, practice naturally becomes more rewarding. Over time, this leads not only to improved motivation but also to stronger skill retention and musical confidence.
The most successful piano learners are rarely those who force themselves to practice the most. They are the ones whose practice methods make learning feel purposeful, measurable, and engaging.

Many people start learning piano with enthusiasm, only to stop practicing weeks later. This pattern is so common that it’s often blamed on a lack of discipline or motivation. In reality, inconsistency is usually the result of poor learning structure rather than personal failure.
The real question is not whether a piano learning app has enough content, but whether it supports the conditions required for consistent practice over time.

Consistency depends less on motivation and more on repeatable systems. Research in behavioral psychology shows that habits form when actions are tied to stable cues, immediate feedback, and manageable effort. Until those conditions are in place, practice relies on willpower—which is fragile under stress, fatigue, or busy schedules.
For piano learners, inconsistency typically stems from:
When learners can’t tell whether they are improving, practice quickly feels optional.
Most piano apps are built around content delivery: lessons, songs, and exercises. While this can be effective short term, it often fails to support long-term consistency.
Common weaknesses include:
These designs may keep users engaged briefly, but they rarely support independent learning habits.

Research in motor learning and music education consistently highlights a few principles that matter for sustained practice:
Apps that align with these principles reduce friction around starting and continuing practice.
MuseFlow can be examined as one example of how these principles are implemented in practice. Rather than centering learning around memorizing songs, the app emphasizes sight reading, timing accuracy, and structured progression.
In practical terms, this looks like:
These features are not novel on their own, but their value lies in how they reduce uncertainty during practice. Learners always know what to work on next and whether they are improving.
One well-established concept in learning psychology is flow—a state where challenge and ability are balanced closely enough to maintain focus without stress. When tasks are too easy, learners disengage; when too hard, they avoid practice altogether.
Adaptive systems that adjust difficulty in small increments help learners remain in this optimal zone more consistently. Over time, this makes starting practice feel less effortful, which is critical for consistency.

Regardless of which app a learner uses, consistency improves when practice follows a few basic rules:
Even ten minutes of focused daily practice is more effective than long, irregular sessions.
Perfectionism is one of the most common reasons learners quit. When progress does not match expectations, frustration replaces curiosity. Educational research shows that learners who focus on gradual improvement persist longer and retain skills more effectively.
Tools that normalize mistakes and emphasize progress over precision help counter this effect, particularly for adult beginners.
The difference between people who continue learning piano and those who stop is rarely talent. It is consistently supported by structure, feedback, and realistic expectations.
A piano learning app that helps learners stay consistent does not rely on inspiration or hype. It removes friction, clarifies progress, and supports habit formation through thoughtful design. When those conditions are met, regular practice becomes far more achievable—and sustainable.

Keep up to date on our progress as we continue to add new features!